Add date range shading (curtains) to individual task rows

Question:     

I know how to set up curtains for a schedule, to shade a date range.  How can I shade only certain task rows?  


Answer:

First, you will need to set a name for a curtain that will be used on a task row.  See instructions below for what needs to be done next.


Set up curtains for individual task rows  


  1. On the Format tab, choose Curtains (Shade by Date Range).  

  2. Click the Add button.  

  3. For Optional Curtain name type in text to display with the curtain.

  4. Set the Start Date and Time and the End Date and time for the curtain.  

  5. Pick curtain patterns and colors.

  6. Give the curtain a name.

  7. Click OK.  (See Steps 7-10 below for steps to add the named curtain to a task row.)


STEPS 8-10 Add a named curtain to a task row:

  1. Right click a task row and choose Curtain.

  2. In the Curtains for Current Task Row dialog box, pick up to 5 named curtains for the task row.

  3. Optionally, it's possible to override the start and end dates for each named curtain.  The overrides will only apply to the task row.

  4. Press OK to see the curtain applied to the task row.


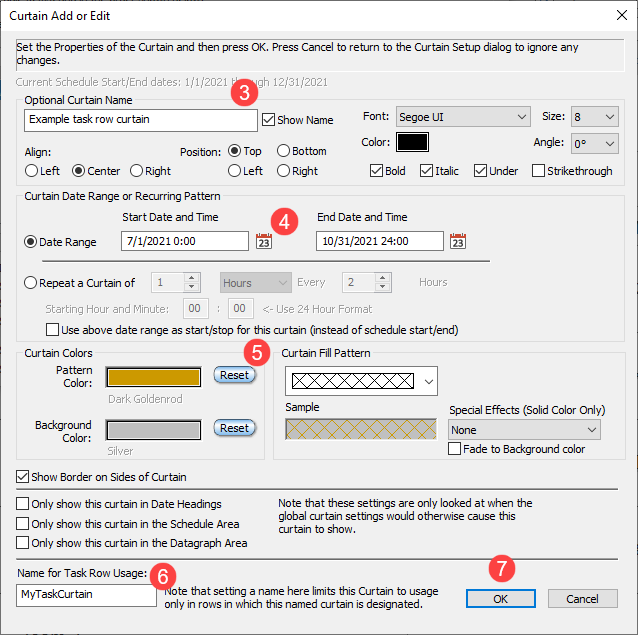
  Names are only needed when curtains will be added to a task row.  


Related topics

Curtains (Milestones Professional Help)    

20 Day vertical gridlines

Standard curtains for all my projects


Applies to Milestones Professional:    2019        2021        2023


The fast easy way to schedule your projects:  Milestones Software by KIDASA Software, Inc. www.kidasa.com

Copyright © 2023 KIDASA Software, Inc. All rights reserved.