Question:
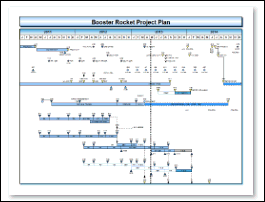
I want to create a chart like this one on your web site and update it from Microsoft Project. Any tips? I plan to show mostly finish dates.
|
Answer:
There are a few ways to do this:
First way: Ad hoc using Link to Active MS Project task
It's easy to "grab" just a few tasks at a time and put them on one or more task rows in Milestones.
Learn More
Second way: Code and import
Learn more
Third way: Flag and Import
Condensing one or more large projects onto a single page is a common problem, often requiring some up-front planning. Here are some simple guidelines you can follow to make the process easier. Steps 1 through 4 are required for setup of the presentation schedule. Once you have completed steps 1 through 4, Step 5 (Refresh) is all you need to do to keep the schedule updated.
STEP 1 - Flag the tasks in Microsoft Project
-
Microsoft Project offers 20 "Flag" fields (Flag 1 through Flag 20). Choose one of these fields.
-
In Microsoft Project, for each task to appear on the presentation schedule, set the flag to "Yes".
STEP 2 - Import the flagged tasks
-
In Milestones Professional, on the Connections tab choose Create Report from Project (or Create Report from Project Server.)
-
For Only import tasks with this Flag Yes, choose the flag field you established above.
-
For Tag with this ID field for future updates choose a field you plan to use as a unique identifier when refreshing. If updating from a single file, uniqueID is best. (If updating from multiple Microsoft Project schedules, see this article.
-
Since you plan to show finish dates, choose Use a built in template.
-
Under the Milestone category, choose Finish Dates.
-
Click Next.
-
Under Finish, choose the Microsoft Project field you want to appear with each finish date symbol. Optionally, choose a field to appear as a symbol note.
-
Save the schedule.
Rearrange tasks and beautify the schedule
-
On the Tools tab, choose Dates. Be sure that the Lock symbol to date when copying or moving ... is checked.
-
Move symbols by holding down the Shift key while dragging to another row.
-
Enhance your schedule using color themes, curtains, and shading.
-
Save the schedule when finished.
Tip: if your schedule is quite large, temporarily set the rows per page to 50 or more.
|
 2017
2017