|
The date range is the time span which is displayed in the schedule area. The date range can be as small as one minute (in which case the start and end dates are the same), or it can span several years, decades, or centuries.
Symbols and bars can be added outside the visible date range.

Set the entire schedule's date range
-
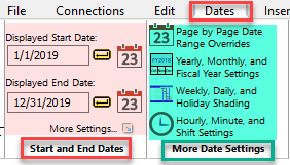
Choose Dates | Start and End Dates.
-
Set the Displayed Start Date and Displayed End Date for the schedule by entering dates or using the calendar icon  . .
-
Click the Apply button  to display the dates entered. to display the dates entered.
Set the current page date range
-
Choose Dates | Start and End Dates | More Settings.
-
Choose the Page by Page Date Overrides option.
-
For Current Page Override set the Starting Date and Ending Date by entering dates or using the calendar icon  . .
-
Click OK.
 If the schedule will span less than one day, click the Hourly/Minute tab to set the schedule’s start and end times. If the schedule will span less than one day, click the Hourly/Minute tab to set the schedule’s start and end times.
Change the week starting day
-
Choose Dates | Start and End Dates | More Settings.
-
Click Weekly/Daily/Holiday Shading...
-
Select a day under Week Starting Day.
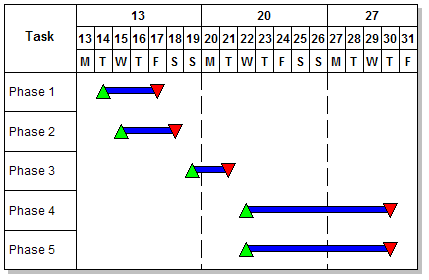
In this example the week starting day is Monday.
Make all months the same length:
-
Choose Dates | Start and End Dates |.
-
Click Yearly/Monthly/Fiscal Year Settings.
-
 Months all same length. Months all same length.
-
Enter the number of Days in a Month.
If this option is selected, the days set for the starting and ending dates for the schedule must be less than the number entered in Step 4 above. For example, if all months have 28 days, a date of 12/31/2021 will be invalid. Turning off Saturdays and Sundays is incompatible with the Months all same length option. All days of the week will be displayed.
|