Project to Milestones Wizard - Custom symbology
|
When standard symbology choices don't work, design your own custom symbology. Custom symbology is available in 3 places:
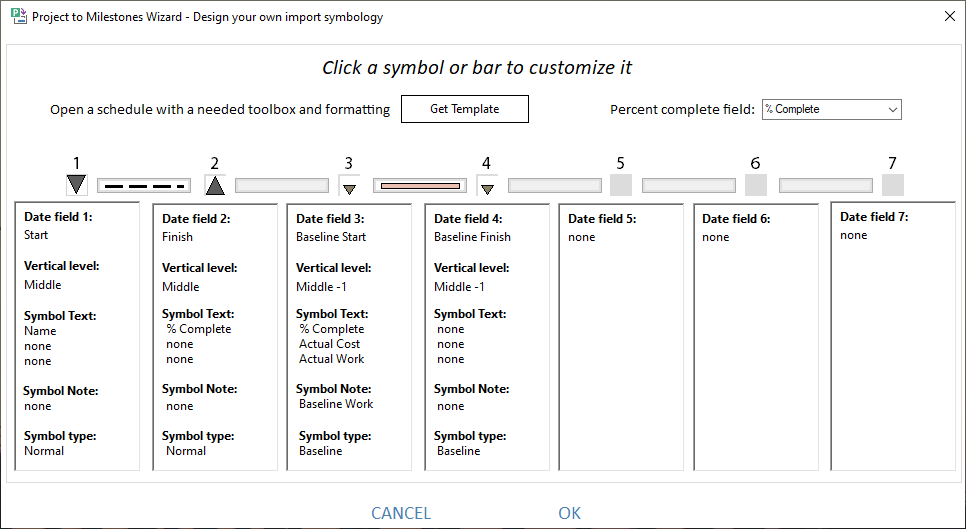
The Custom symbology dialog box makes it possible to add up to 7 symbols for each Microsoft Project task. Optionally, a horizontal connection can be added between every two symbols. Start with the left-most symbol (1). Click on the actual symbol to customize. Then, click on symbol 2 to customize it. Then, click on the bar in between 1 and 2 to customize or hide the bar. Repeat this sequence for other Microsoft Project date fields as needed.
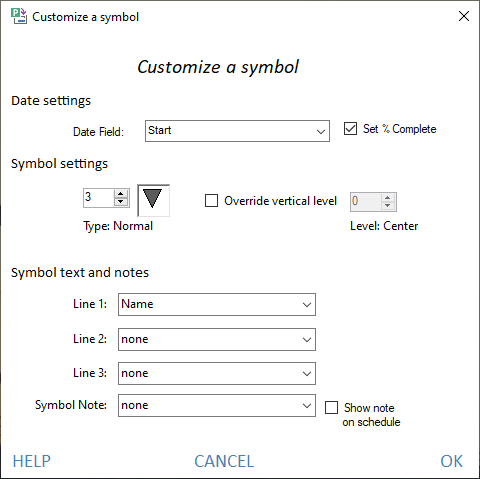
Set Symbol PropertiesAfter clicking a symbol, the following dialog appears for customization of the symbol. Under Date settings, pick a date field for the symbol. Make other selections for the symbol, including the symbol type (from the toolbox), and the symbol text and note fields. When scrolling the symbols be sure to pick a normal symbol for dates other than baseline. Choose Set % Complete if you want Milestones to set the % complete for the symbol. This is usually only done for the Start date symbol.
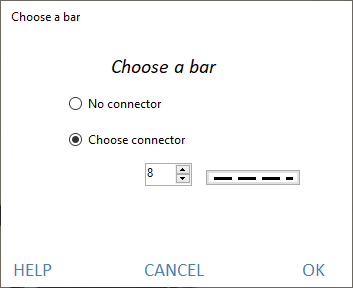
Pick barAfter clicking a bar, the following dialog appears for customization of the bar. Select No connector if no horizontal connector is desired. If a bar or line connecting two symbols is needed click Choose connector and select a bar.
|
Related Topics