Add symbols and bars many ways
|
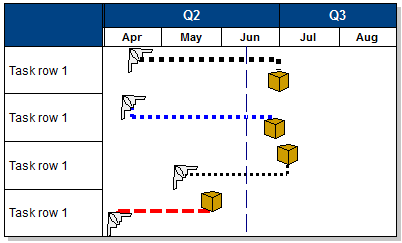
Symbols (milestones) are used to show project dates. Bars are used to show time spans. Using the customizable toolbox, combinations of symbols and bars are limitless due to the vast number of symbol and connector possibilities.
|

|
|
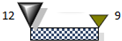
Add a single symbol 
|
|
|
 The
The 
Add a horizontal bar and symbol to an existing symbol:
|
|
|
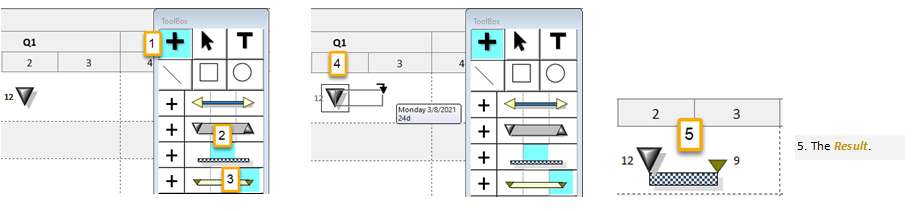
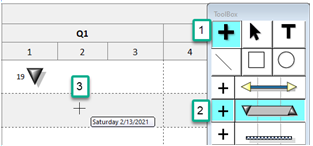
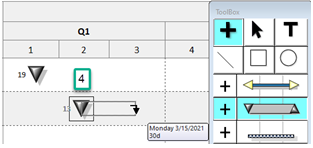
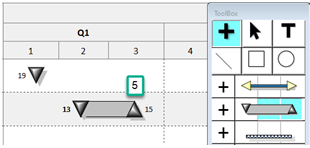
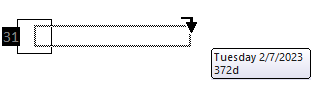
Add a task bar with start and end milestones 
|
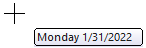
The status bar at the bottom of the screen indicates the date and time as the mouse is moved.
|
|

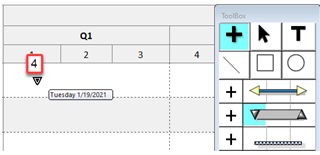
Add a bar with no visible endpoints 
|
|
Add a blank/null symbol to the toolbox:
Add a bar with no visible end points to the schedule:
resulting bar: |


Highlight invisible symbols Using invisible symbols in Milestones schedules is a standard practice. With highlighting, it's easy to see exactly where those symbols lay in the schedule. Find this option in View | Optional Items | ![]() Highlight invisible symbols.
Highlight invisible symbols. 
Add symbols using date SmartColumns 
Add a symbol to the schedule using a date SmartColumn
Add a symbol to the schedule using a date SmartColumn:Symbols and bars can be added to the schedule through the Start Date SmartColumn and End Date SmartColumn. When the date is typed in the Start Date SmartColumn cell, a start symbol appears on the schedule. When a date is typed in the End Date SmartColumn cell for that same task, an end date symbol and bar, originating at the start symbol, appear on the schedule.
- Add a symbol to the schedule using a date SmartColumn
- Make sure both the "Start Date" and "End Date" columns are selected.
- Click
 (toolbox Text tool).
 - Add the start date in the Start Date column.
- Add the end date in the End Date column.
Control which symbols appear when entering dates in date SmartColumns:
- Right-click either the Start Date or End Date SmartColumn.
- Choose Properties.
- Click the Column Type (SmartColumns) Settings tab.
- Pick the symbols and bar to use for Start and End Dates.
- Optionally, if baseline columns are on the schedule, pick the symbology for the baseline symbols.
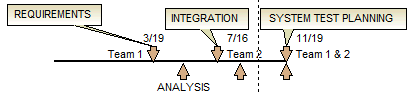
Add "Birds on a wire" - multiple symbols on a bar 
-
First, add a bar with no visible symbol end points.
-
In the toolbox, click a symbol such as a down pointing triangle.
-
In the toolbox, click
 (toolbox Plus tool).
 -
Click and drag to add the symbol above the bar.
-
If needed, change the vertical level of the symbol.
Example 1:
|
|
Bar: Shape # 5 with symbol shape #28 as endpoints BIRDS: symbol shape #5 for "birds". |
Example 2:
|
|
Bar: Bar shape # 8 with thick line pattern and symbol shape #28 as endpoints, Birds: symbol shape #68 and 69 as birds. |
Example 3:
|
Bar: Bar shape #9 with line pattern #27 Birds: Symbol #3 |
|
| See more examples in the knowledgebase |
|

Horizontal bars to show slips 
Show slips and early starts on multi-level symbols using any of the following horizontal bar types.
Find this option by double-clicking on any horizontal bar in the toolbox. When the Bar Options dialog box appears, use the scroll down arrows to choose one of the new Bar Types. These bar types are numbered 43, 44, 45, and 46.
Snap to minute increment option
|
When adding a milestone symbol with minute and hourly detail turned on, use the "snap to minute" option to more easily force symbols to fall on specified increments. For example, if an increment of 30 minutes is chosen, as the mouse is moved, times will be displayed every 30 minutes. Options for “Snap To” include: none, 5, 10, 15, 30, and 60. (Choose 60 to only display times every hour.) Turn on the snap to minute increment option:
|
Related Topics
|
|