Groups

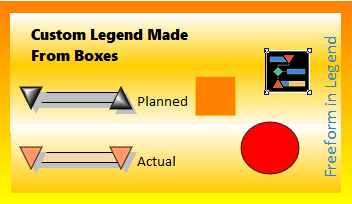
Originally created to enable creation of intricate legends, groups can be used to combine typical legend items (symbols and bars) with freeform text, boxes, lines and circles.  Groups can be used instead of or in addition to a legend.  They can also be used for generating headers and footers, tables and more.


Create a group

Add a new group to a schedule
  1. Add a circle, line, rectangle text or picture to a schedule.
  2. For each item added, set the group number.  

A default title is automatically added for inserted SmartColumns.


Set the group number for an item to be grouped
  1. Click  (the toolbox Arrow tool) and click once on the item (line, circle, box, text, picture)
  2. In the toolbox, pick a group number.  Use the same group number for all items to be kept together.
 
 
Add symbols and bars to a box:
  1. Click  (the toolbox Arrow tool) and click once on the box.
  2. In the toolbox, click the  Add/Edit Legend Entry for this box: 


Move a group

  1. Click  (the toolbox Arrow tool.)
  2. Click one of the items in the group.
  3. In the toolbar, click this.  Once this is checked all items in the group will be moved together (until un-checked.)


  1. Once all the items are grouped, they can be moved as a group.


Manage groups

  1.  Click  (the toolbox Arrow tool.)
  2. Pick one of the items in the group.
  3. In the Group section (Circle Group, Box Group,... ), click Manage Groups
  4. Click Delete Column on the right-click menu that comes up, or press the keyboard Delete key.


Copy and paste a group 

A group can be copied and pasted to the same schedule or to another schedule that has been opened in the current Milestones instance.

Copy a group on the same schedule:
  1. Right-click the group.

  2. Pick Copy Group 1 (or other group number).

  3.  Right click somewhere else on the schedule (without clicking on an object.)  

  4. Choose Paste a Copy of Group 1 (or other group number.)

Paste a column on the same schedule:
  1. Right-click the group.

  2. Pick Copy Group 1 (or other group number).

  3. Use View | Switch Windows to navigate to another schedule.

  4.  Right click somewhere else on the schedule (without clicking on an object.)  

  5. Choose Paste a Copy of External Group 1 (or other group number.)  Note that a new group number will be assigned to the pasted group.


Related Topics

  1. Legend
  2. Add text and pictures
  3. Add lines arrows circles or squares