|
It's sometimes useful to add a line, arrow or circle/ellipse, or a rectangle that is independent of any dates or tasks on the schedule. Typically this is done to illustrate or highlight something on the schedule.
Set defaults for the drawing tools.
- In the toolbox, double click on one of the drawing tools ( Line (
 ), Circle ( ), Circle ( ) Rectangle ( ) Rectangle ( ). ).
- A dialog box will be displayed. Make selections (like color and line pattern.)
- Once set, new objects will have the settings. For example if the line in the toolbox is set to dashed with arrows, all new line objects will have those properties.
Use the (toolbox Line tool), to add lines to the schedule.
 Lines, circles and rectangles added with the drawing tools are not useful for adding anything which needs to be associated with dates. Lines, circles and rectangles added with the drawing tools are not useful for adding anything which needs to be associated with dates.
Add a line:
- Click the (toolbox Line tool). The cursor will change to the line add cursor:

- Move the mouse to the starting point of the line.
- Click and drag to create the line. Release the mouse at the end point.
Format the line on the schedule

- Click
 (toolbox Arrow tool). (toolbox Arrow tool).
- Click once to select the line. This will display the Selection menu.
- Change the Background Color, and other properties.
- If working with groups, assign the line to a group.
Delete a line
- Click (toolbox Arrow tool).
- Click once to select the line.
- Press the Delete key.
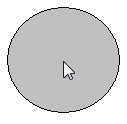
Using the (toolbox Circle tool), it is possible to add circles and ovals to the schedule.
Add a circle or ellipse:
- Click (toolbox Circle tool). The cursor will change to the circle-add cursor:

- Move the mouse to the starting point of the shape.
- Click and drag to create the shape.

Format the circle or oval on the schedule
- Click (toolbox Arrow tool).
- Click once to select the circle. The toolbar displays the selection menu for the selected circle.
- Change the Background Color, Border Pattern, Border Color, Target Color and Special Effects.
Delete a circle or oval
- Click (toolbox Arrow tool).
- Click once to select the shape.
- Press the Delete key, or choose Delete Selected Circle on the Edit menu.
-OR-
- Click (toolbox Arrow tool).
- Right-click the shape and choose Delete.
Make a permanent change for all subsequent circles and ovals enter by double-clicking in the toolbox, and changing the Circle Attributes. To show the shape on top of other objects and shading, click once on the shape and check the box next to "On Top" in the Selection menu. To show the shape on all schedule pages, click once on the shape and check the box next to "Show On All Pages" in the Selection menu.
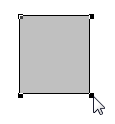
Using the Box tool in the toolbox, it is possible to add boxes, squares or rectangles to the schedule. For example, the user might want to add a rectangular shape to highlight a significant task or build a signature block using boxes and lines.
Add a rectangular shape
- Click (toolbox Box tool).in the toolbox. The cursor will change to this cursor:

- Move the mouse to the starting point (corner) of the rectangular shape, and then click and drag to the opposite corner.
Format the rectangular shape on the schedule
- Click (toolbox Arrow tool).
- Click once on the box in the schedule. This will display the Selection menu.
- Change the box Background Color, Border Pattern, Border Color, Target Color and Special Effects.
- Display this shape only on this page, or, choose to Show On All Pages.
- Leave the shape in the background, or choose to Show On Top of other objects.
Make a permanent change for all subsequent boxes created by double-clicking in the toolbox, and changing the Box Attributes.
Delete a rectangular shape
- Click (toolbox Arrow tool).
- Click once to select the shape.
- Press the Delete key, or choose
 on the Selection tab. on the Selection tab.
-OR-
- Click (toolbox Arrow tool).
- Right-click the shape and choose Delete.
These lines, arrows and circles are independent of the task rows on the schedule.
Move or re-size a line, box or circle shape
Re-size a line, box or circle shape
-
Click (toolbox Arrow tool).
-
Click once on the shape.
-
Click and drag any point that appears on the shape's edge.
Move a line, box or circle shape
-
Click (toolbox Arrow tool).
-
Click and drag from the middle or midpoint of the shape.
|