| Date headings .... they appear above the schedule area and there are quite a few to choose from. End of story. Right? Not necessarily! Learn how to master the date headings and you have mastered a key component of your Milestones schedule. Read on. | 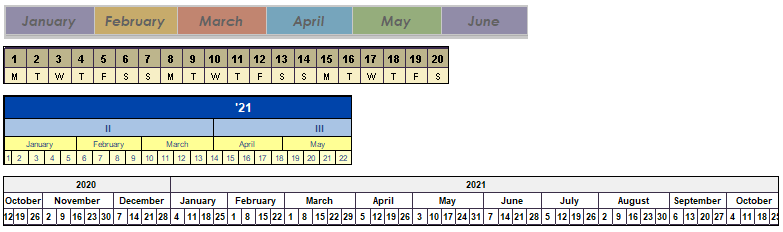 |
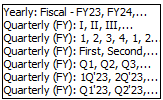
| Date Heading choices: | Date Headings appear above the schedule area (and other facts) : | |
 |
|
Contents
|
Set up the date headings

|
|
 . Click once on the date headings within the schedule area. This will display the
  Show at top and/or

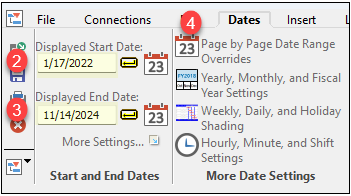
Set the date range (start and end dates)
|
|
Set the schedule date range:
Change the Fiscal Year starting month
|
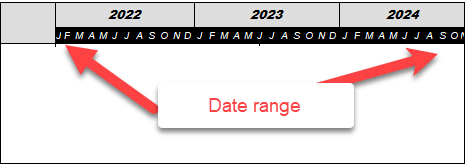
Compress part of the time scale using logarithmic date headings
On a schedule which covers many years, it might be beneficial to expand certain years so that more detail can be seen for those years.
This can be accomplished by using the logarithmic view.

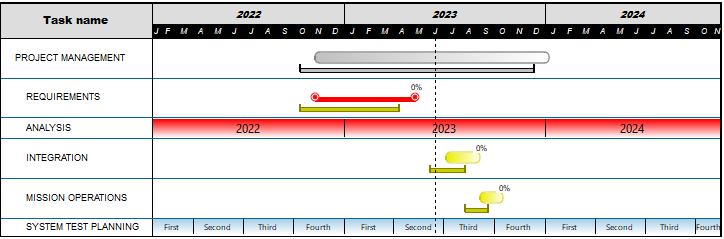
Attach a date heading to a task row
-
Right-click any task row.
-
Choose Attach Date Heading.
-
Right-click the task row and choose Remove/Edit Date Heading to change or delete the date heading.
Curtains
|
|
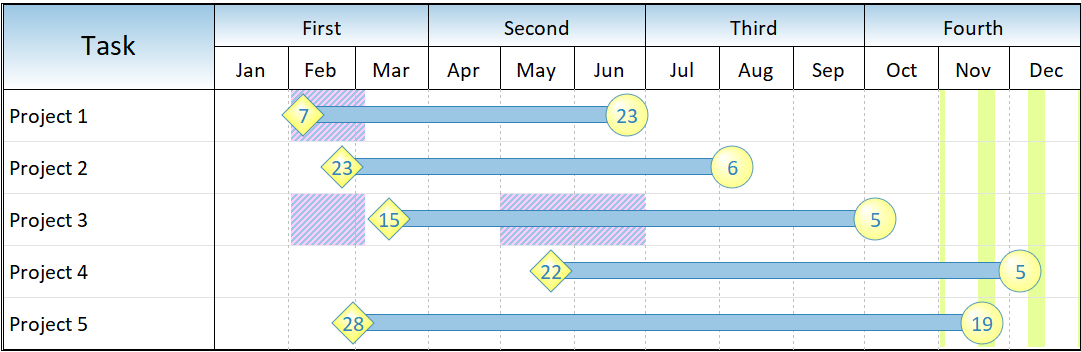
Curtains offer a way to shade any date range on a schedule. Curtains might be used to shade a critical project time span, a holiday season, every other month, or any other time period.
Each curtain appear for a set date range or repeat for a designated period, at specified intervals. the schedule can have as many curtains as needed. |
|
Custom date headings |
Create a custom heading:
|
|

Scroll through the schedule by date
|
It's possible to scroll through the schedule by any number of days so that there is a “sliding” time window. One way is via continuous view (see below). The other way is to scroll by date using the keyboard or toolbar. Set the number of days to scroll by:
Scroll using the toolbarPress the Scroll displayed range backward |
Original:
Scroll forward by 30 days:
Scroll using the keyboardUse Shift+PgUp to scroll backward, Shift+PgDn to scroll backward. |

 or
or  buttons in

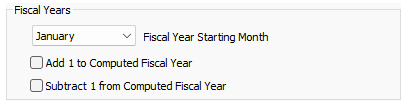
Set the fiscal year start month
|
The alignment of the fiscal and calendar years can be customized. Set the fiscal year start month:
|
In this example, the fiscal year starting month is October:
|


Change the week start day
|
By default, the week starting day for Milestones Professional is Sunday. It can be changed it to any day of the week. Among other features, this setting impacts the date heading display for Week Start Day and Week End Day, and vertical gridlines separating weeks. Change the week starting day:
|
In this example the week starting day is Monday.
|
 .
.
Schedule down to the minute
|
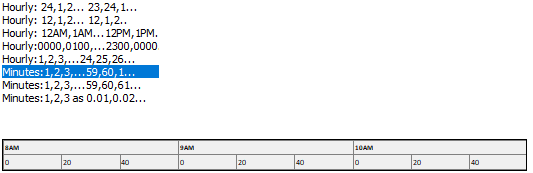
Turn on hourly and minute detail:
|
Hourly/minute heading types include military time and more:
|

Examples
Numbered and lettered days of the week
Logarithmic time scale:
|
Month names with colored curtains in the date heading
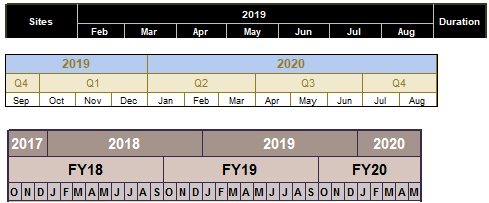
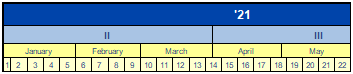
Calendar years, quarters, months and weeks
|


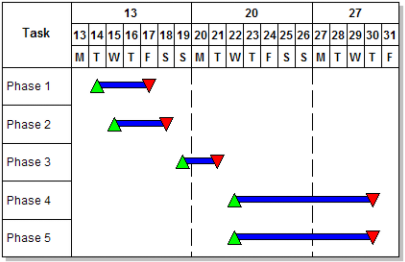
Custom Heading: Phases

 The maximum number of daily divisions in the date heading is 1798 days; monthly divisions 698 months; yearly divisions is 398 years. Milestone Professional supports dates from the year 100 CE (A.D.) through the year 7000 CE (A.D.). For dates outside this range, use custom headings.
Gradient fills
|
Gradient fills allow for some interesting special effects in the date headings. For each date heading level (2 in the example below), pick a Background color, Effects and a Target color.
|
|

