A task row is one of the basic components of a schedule.
Contents
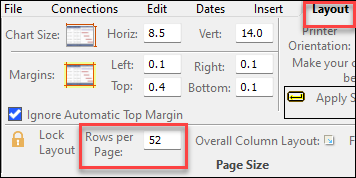
Set the number of rows per page
Enter the rows per page
Set the number of rows per page by entering a number here (Layout tab | Rows per Page)
Line guides
By default, thin blue line guides are shown to make it easy to see each task row. Turn these on / off on the View tab, Optional Items section.
Enter task names on a row
-
Click
 (the toolbox Text tool.)
 -
Click once within a column's cell.
-
Begin typing.
|
|
|
Each task row's height can be adjusted using the mouse or by entering a specific height value. The default row height is based on an equal distribution of row heights according to the size of the schedule and the number of rows per page.
Adjust task row height
Adjust the height of a single task row using the mouse:
-
Click
 (the toolbox Arrow tool.) .
 -
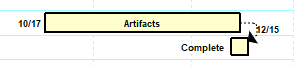
Move the cursor to the lower edge of the task row to be adjusted, until the cursor looks like this:

-
Click and drag the row's lower horizontal gridline (or line guide), then move the row to the new height, as shown:
Adjust the height of a single task row using a specified value:
-
Click once on the task row to be adjusted. This will display the Selection menu.
-
In the Task Row Settings section, change the value for Row Height Override.
Reset all rows to default height:
All task rows with row height overrides can be reset to the default value, based on the number of rows per page value.
-
Choose Layout | Row/Symbol Sizes | Reset all Rows to Default Height.
Reset a single row to default height:
-
Click once on the task row to be adjusted. This will display the Selection menu.
-
In the Task Row Settings section, choose
 next to Row Height Override.
Turn row height adjustment on or off
-
Click Tools | Program Options | Edit.
-
 Allow Task Row Height Adjustments.
 The default row height is based upon the settings for rows per page. Any row that will not fit on that page after the height adjustment will move to the next page. By default Allow Task Row Height Adjustments is turned on.
Insert task rows
There are several ways to insert a new, blank task row into the schedule.
Insert a new task row at the top of the page
- Choose Insert | Rows, Columns | New Task Row.
Insert a new task row between two existing task rows
-
Select the task row before which a task will be added.
-
Choose Insert | Rows, Columns | Task Row.
Insert a new task row using the Insert key on the keyboard
-
Click
(the toolbox Text tool.) . -
Click the beginning of the task row to position the flashing cursor at the beginning of the line that will be the new row.
-
Press once on the Insert key on the keyboard.
-
Press the Enter key to insert a row.
Set up shading and grid lines

Apply a color theme:
Customize horizontal gridlines for selected tasks:
|
Set default horizontal gridlines for the entire schedule:
|

Insert and remove page breaks
|
A page break can be forced before any task row. Insert a page break:
Remove a page break
Remove all page breaks
|
Select task rows and task cells
Select a single task:
Select a single cell on the task row:
Select all tasks:
|
Select several contiguous task rows:
Select several non-contiguous task rows:Example of selecting task rows while holding down the Ctrl key on the keyboard:
|